

I’ve been perusing the Madewell site again. And I came across this beautiful crisp white blouse.

I instantly knew I wanted to use the Hey June Handmade Willamette pattern to recreate the look.

But it wasn’t until Audrey @skirtfixation started a sew along in her Instagram stories for Hey June June that found the motivation to do it.
The ready to wear blouse is very close to Willamette’s view A with a few departures; there’s a pleat in the front and the lower back has 2 separate panels with button plackets.
To achieve this look, I made the following pattern adjustments:
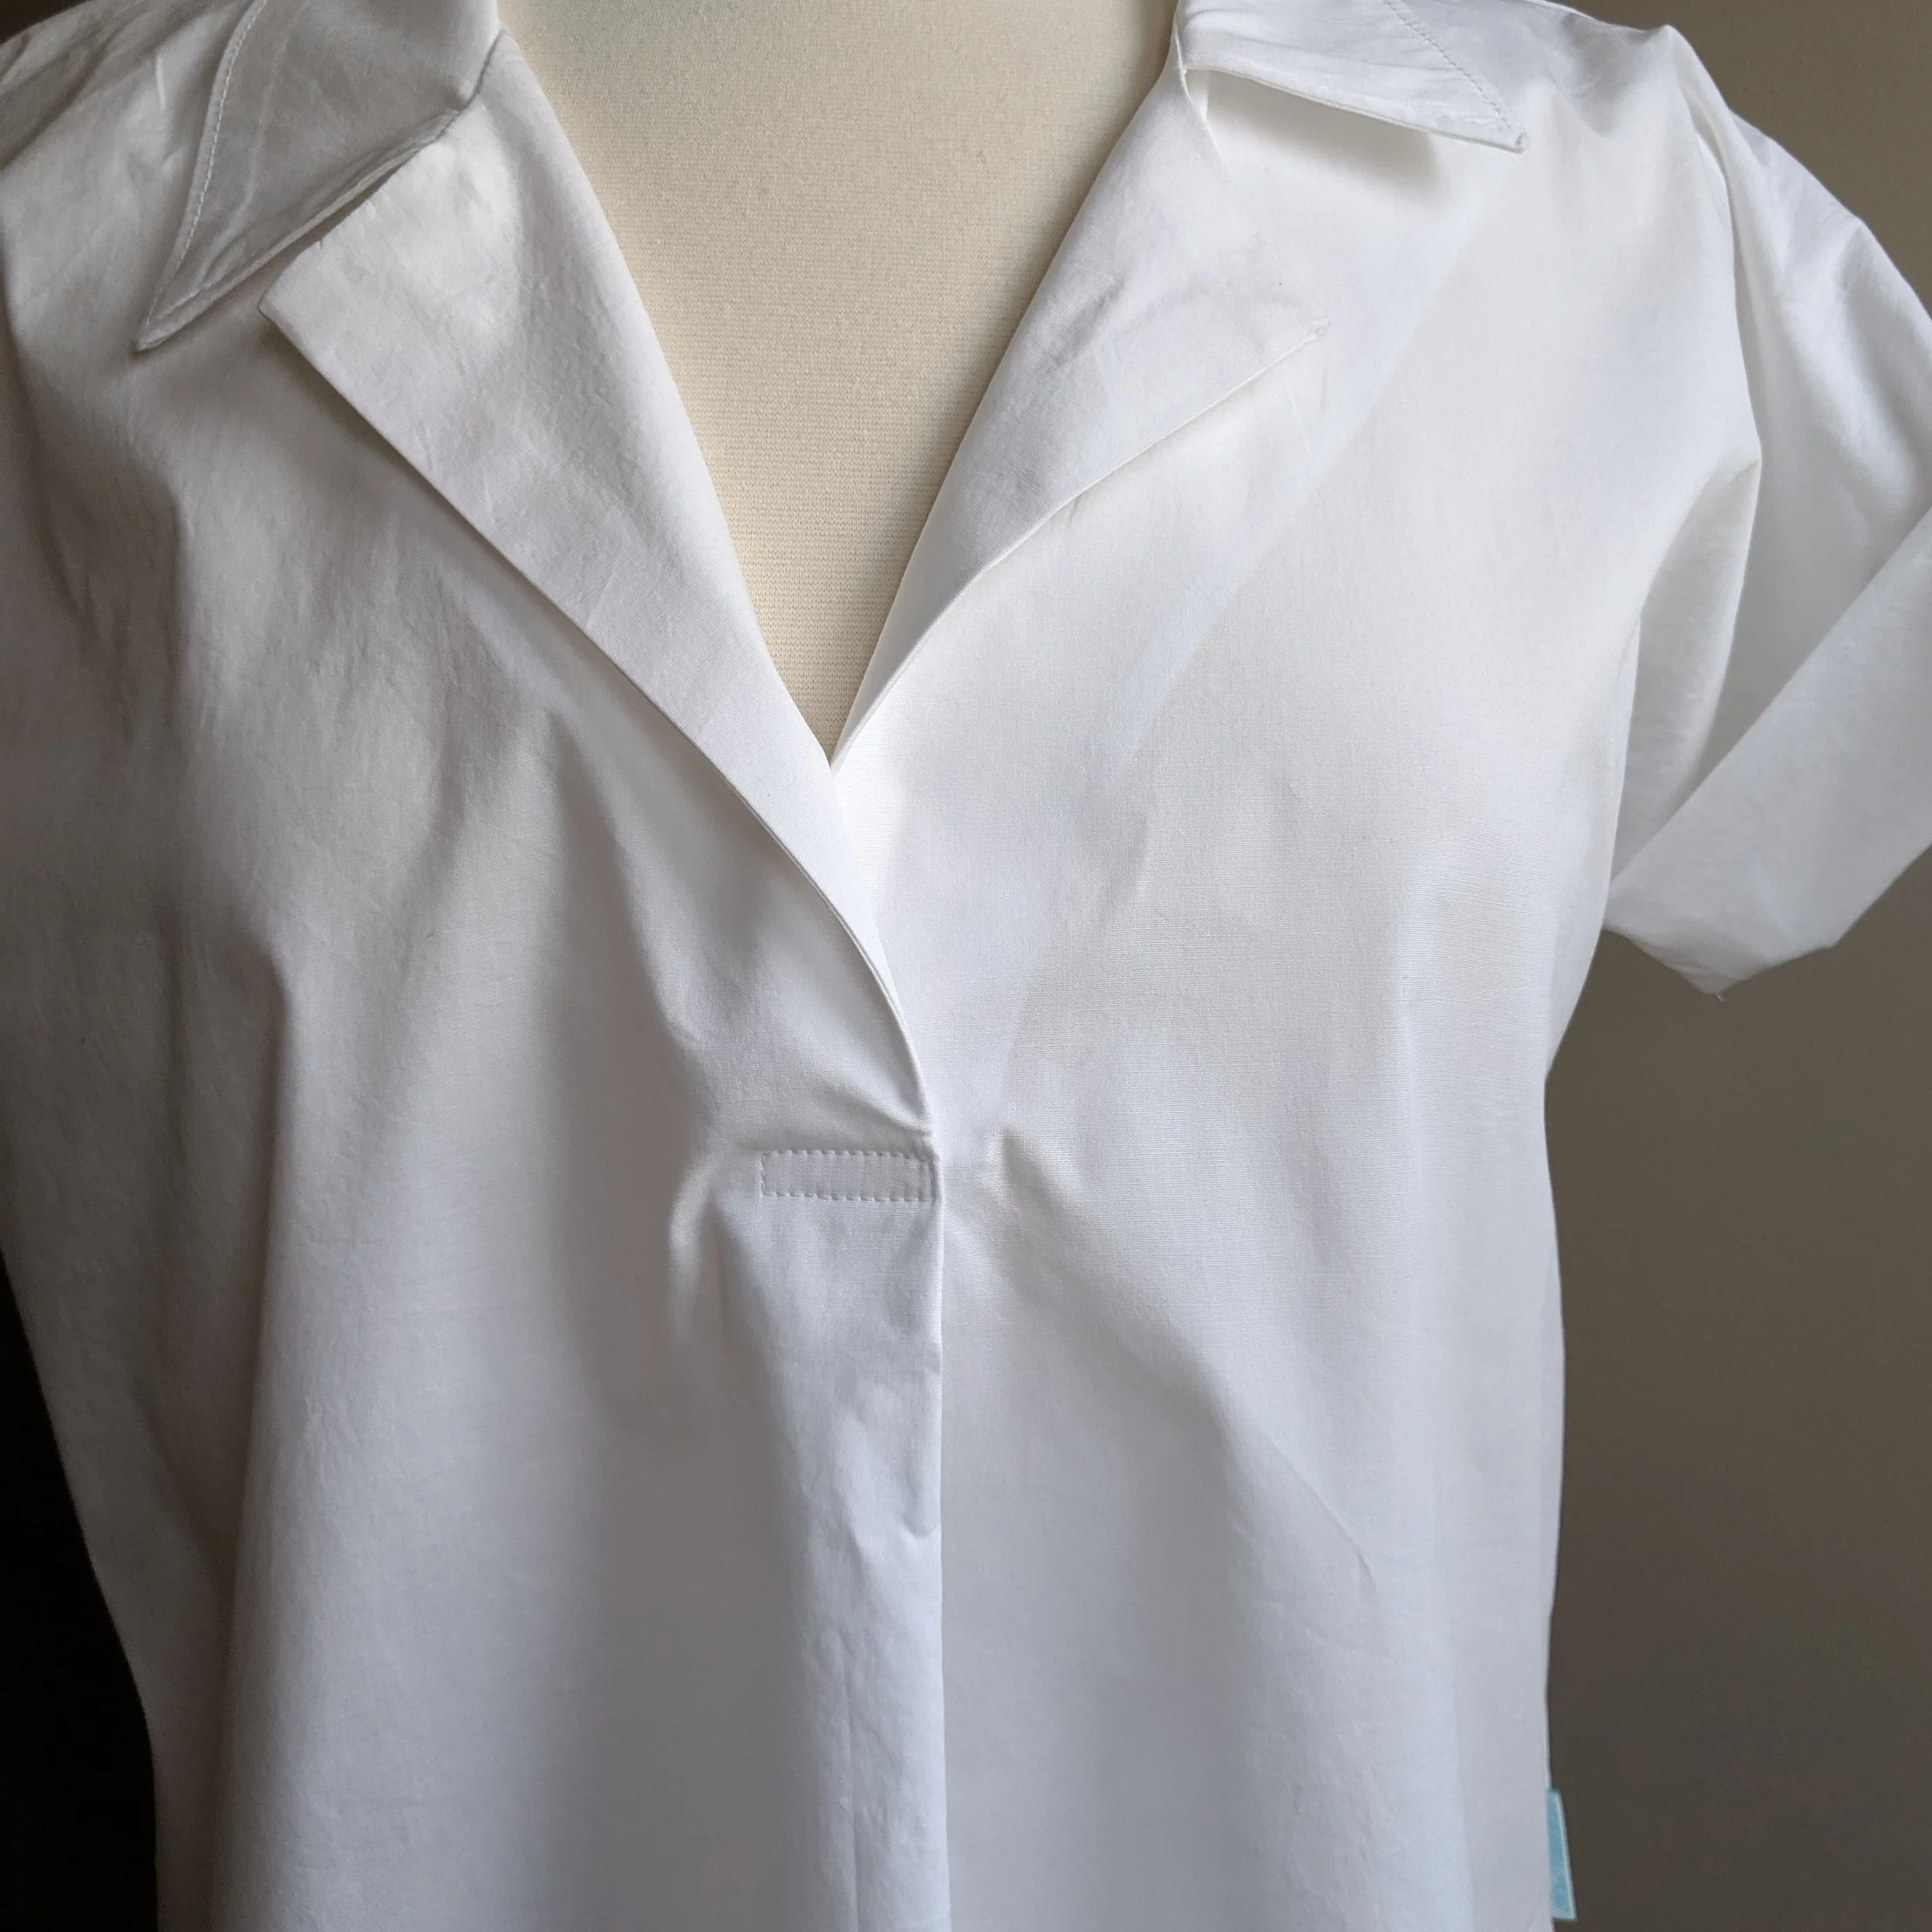
Cut 1 front on the fold. Marked a line down the center of the cut fabric, ending at the level of the stitch line pattern marking. This became a cut line after sewing the neckline.
Cut 1 front facing (and 1 of interfacing) on the fold, 2 inches below the stitching line marked on the main front piece. Again, marked a line down the center.
Cut 2 mirrored backs, adding width along the original fold line. I measured 2.5 inches from the original pleat marking (center back notch). Interfaced (2 inches wide) at the center back cut line. This became the button plackets.

Construction changes-
Attached the main front to one back yoke at the shoulders.
Similarly, joined the shoulders on the front facing (outside and bottom edge finished) and the other back yoke (now the yoke facing).
With the rights sides together and assembled collar sandwiched in between, stitched front/back yoke and facing/yoke facing together along the neckline and down around the marked center line.
Cut down the marked center line and into the corners.

I apologize my fabric is the same on both sides. I didn’t set out to make a tutorial when I made this top.
Flipped the facing/yoke facing completely to the inside.

Sewed the inside and outside shoulder seams together in an alternative method. Instead of stitching in the ditch from the top side, I sewed all the seam allowances together from the inside. (This is quiet hard to describe. I simply pinched all the shoulder seams on one side together, and turned them out so they could be sewn.)
Folded 1 inch to the wrong side on both center back pieces twice. Voila! Button plackets!
With back lower pieces overlapping at the button plackets, placed them RST on the yoke. and burrito rolled the shirt to bring the right side of the yoke facing to meet it. Stitched together and turned it out.

mmmmm. Burrito.
Finished shirt assembly- hemmed, closed side seams and added sleeve cuffs.
The front pleat was all but completed at this point. I simply overlapped the fronts, creating the pleat and stitched through all the layers together to keep it in place.
Voila! The crisp white summer blouse of my dreams.

Fabric is white stretch poplin from Harts.

I love it.

worn with Liana stretch jeans made from Cone Mills denim.
And I look forward to wearing it this summer (especially when my kids aren’t around).
As it turns out, after sharing my blouse on IG, Adrianna said it was actually the Madewell blouse that inspired the Willamette pattern! So we’ve come full circle here!
Heidi was inspired by a similar Madewell top too. Check out her rainbow stripe button-back Willamette (blogged here).