

I'm havin' sew much fun (#sorrynotsorry) sewing 2 different versions of the Cheyenne Tunic pattern by Hey June that I decided I wanted to put the details on the blog (I'm otherwise pretty horrible at taking notes) and I'll be adding to this post to keep time with the sew along that Grace of Maker Mountain is hosting. (Note- the sew along has ended, but I'm sure Grace will host another. If you're in her FB group or follow her on IG you can catch the next one.)

This isn't my first time in the Cheyenne rodeo. I made this white one last fall; it's a crisp, tight twill. So, I haven't tried all the views and options, and I just love joining sew alongs and other sewing challenges for the extra sewcial support. (I owe Grace a big thank you for pushing me to sew my first Lane raglan when she hosted a sew along for that pattern.)
Day 1-

The first day was about picking fabric, size and options. I pulled a few fabrics from my stash that were speaking to me and polled the InstaCrowd to help me decide.
My measurements are- chest 36" (high bust 35"), waist 29/30", hips 39/40" and I chose to prep my pattern in size small. I shortened the long sleeve pattern piece 1" somewhat arbitrarily as the suggestion is for petites to remove 2" and I'm 5'5".
I printed both views and all the pattern options just to have them. The only thing I knew for sure was that I wanted to try making a sleeveless Cheyenne using the mods outined on the Hey June blog. It sounds easy enough! And since I own and have sewn Biscayne, I used that pattern as my guide for the new armscyes.

Day 2-
Just cutting and interfacing today. Yeah. No big deal.
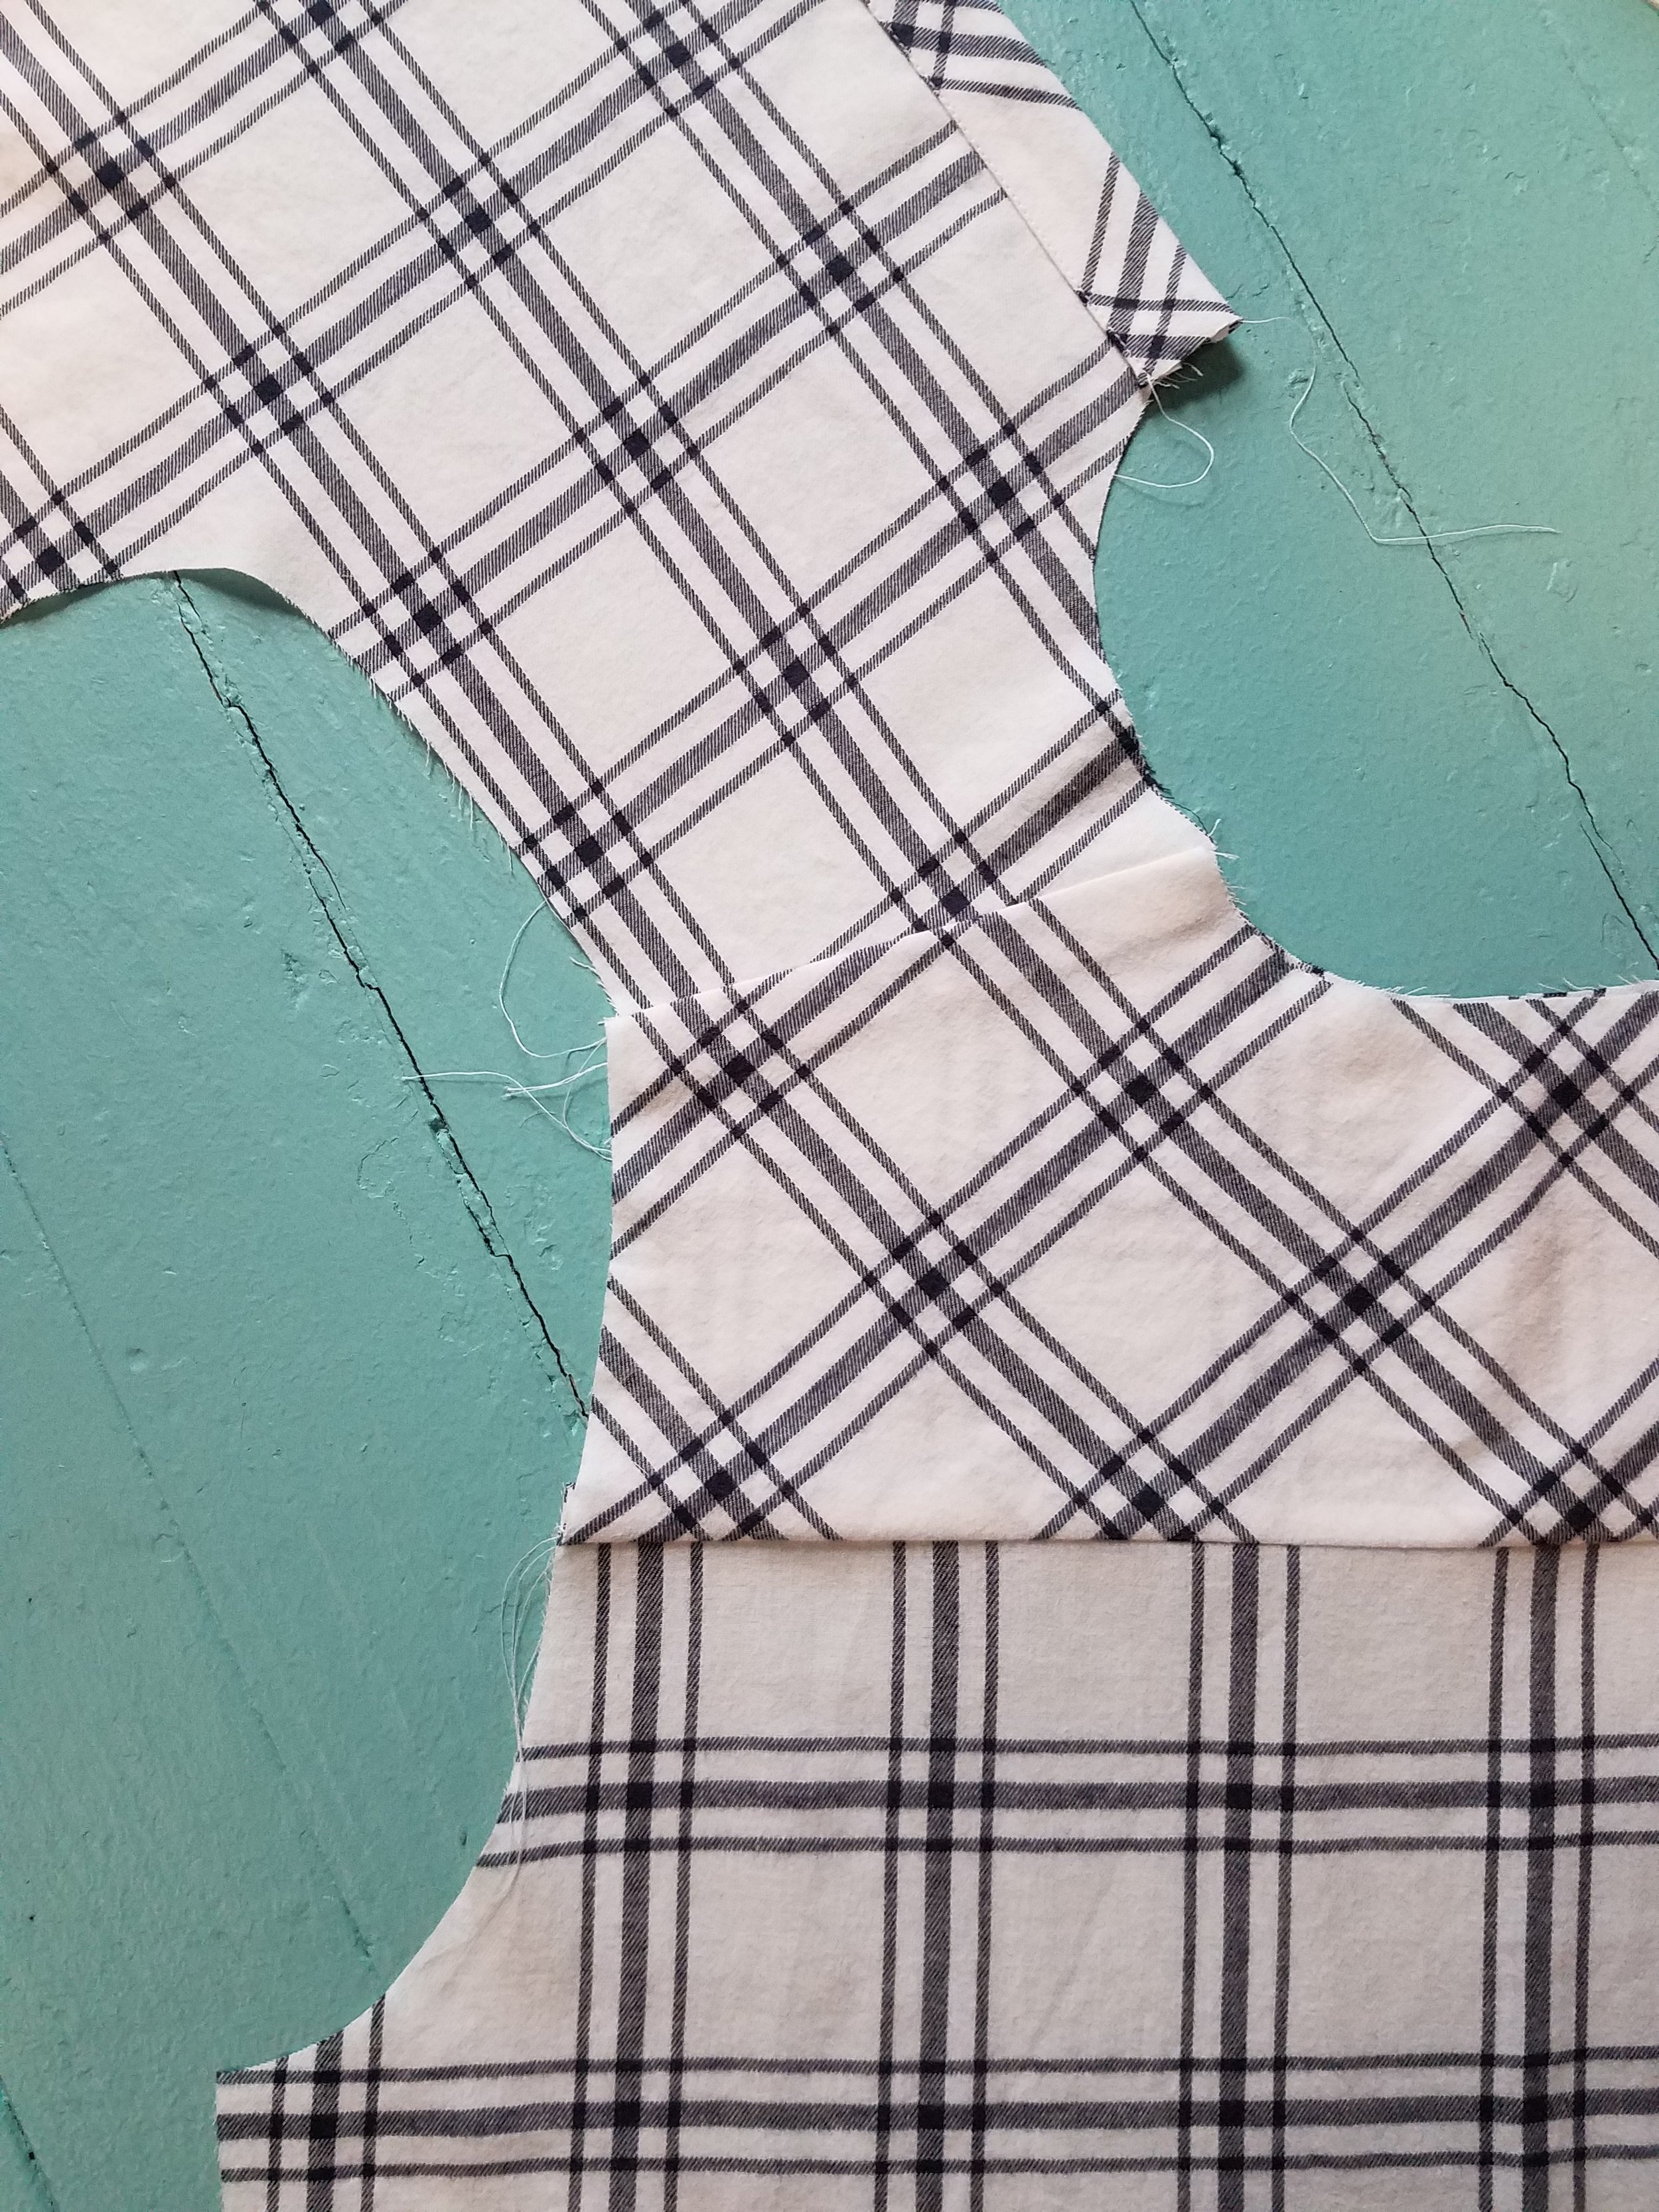
Except it took me forever. I ended up deciding to use a light windowpane plaid I found in my stash (Yup. Not one of the original 4 I pulled.) for a full button-up, collared version with long sleeves. And I tried to strategize plaid matching having not eaten lunch. Yeesh. A headache ensued.
I was confused by the interfacing instructions for the long sleeve cuffs. The cuffs are 'cut 2 on fold' and the interfacing is 'cut 1 on fold.' Well, you need to then cut the interfacing in half so you can interface one half of each cuff. Cutting 2 of the interfacing NOT on the fold jives with my brain better. So after scratching my head a bit and studying the instructions, that's how I did it.

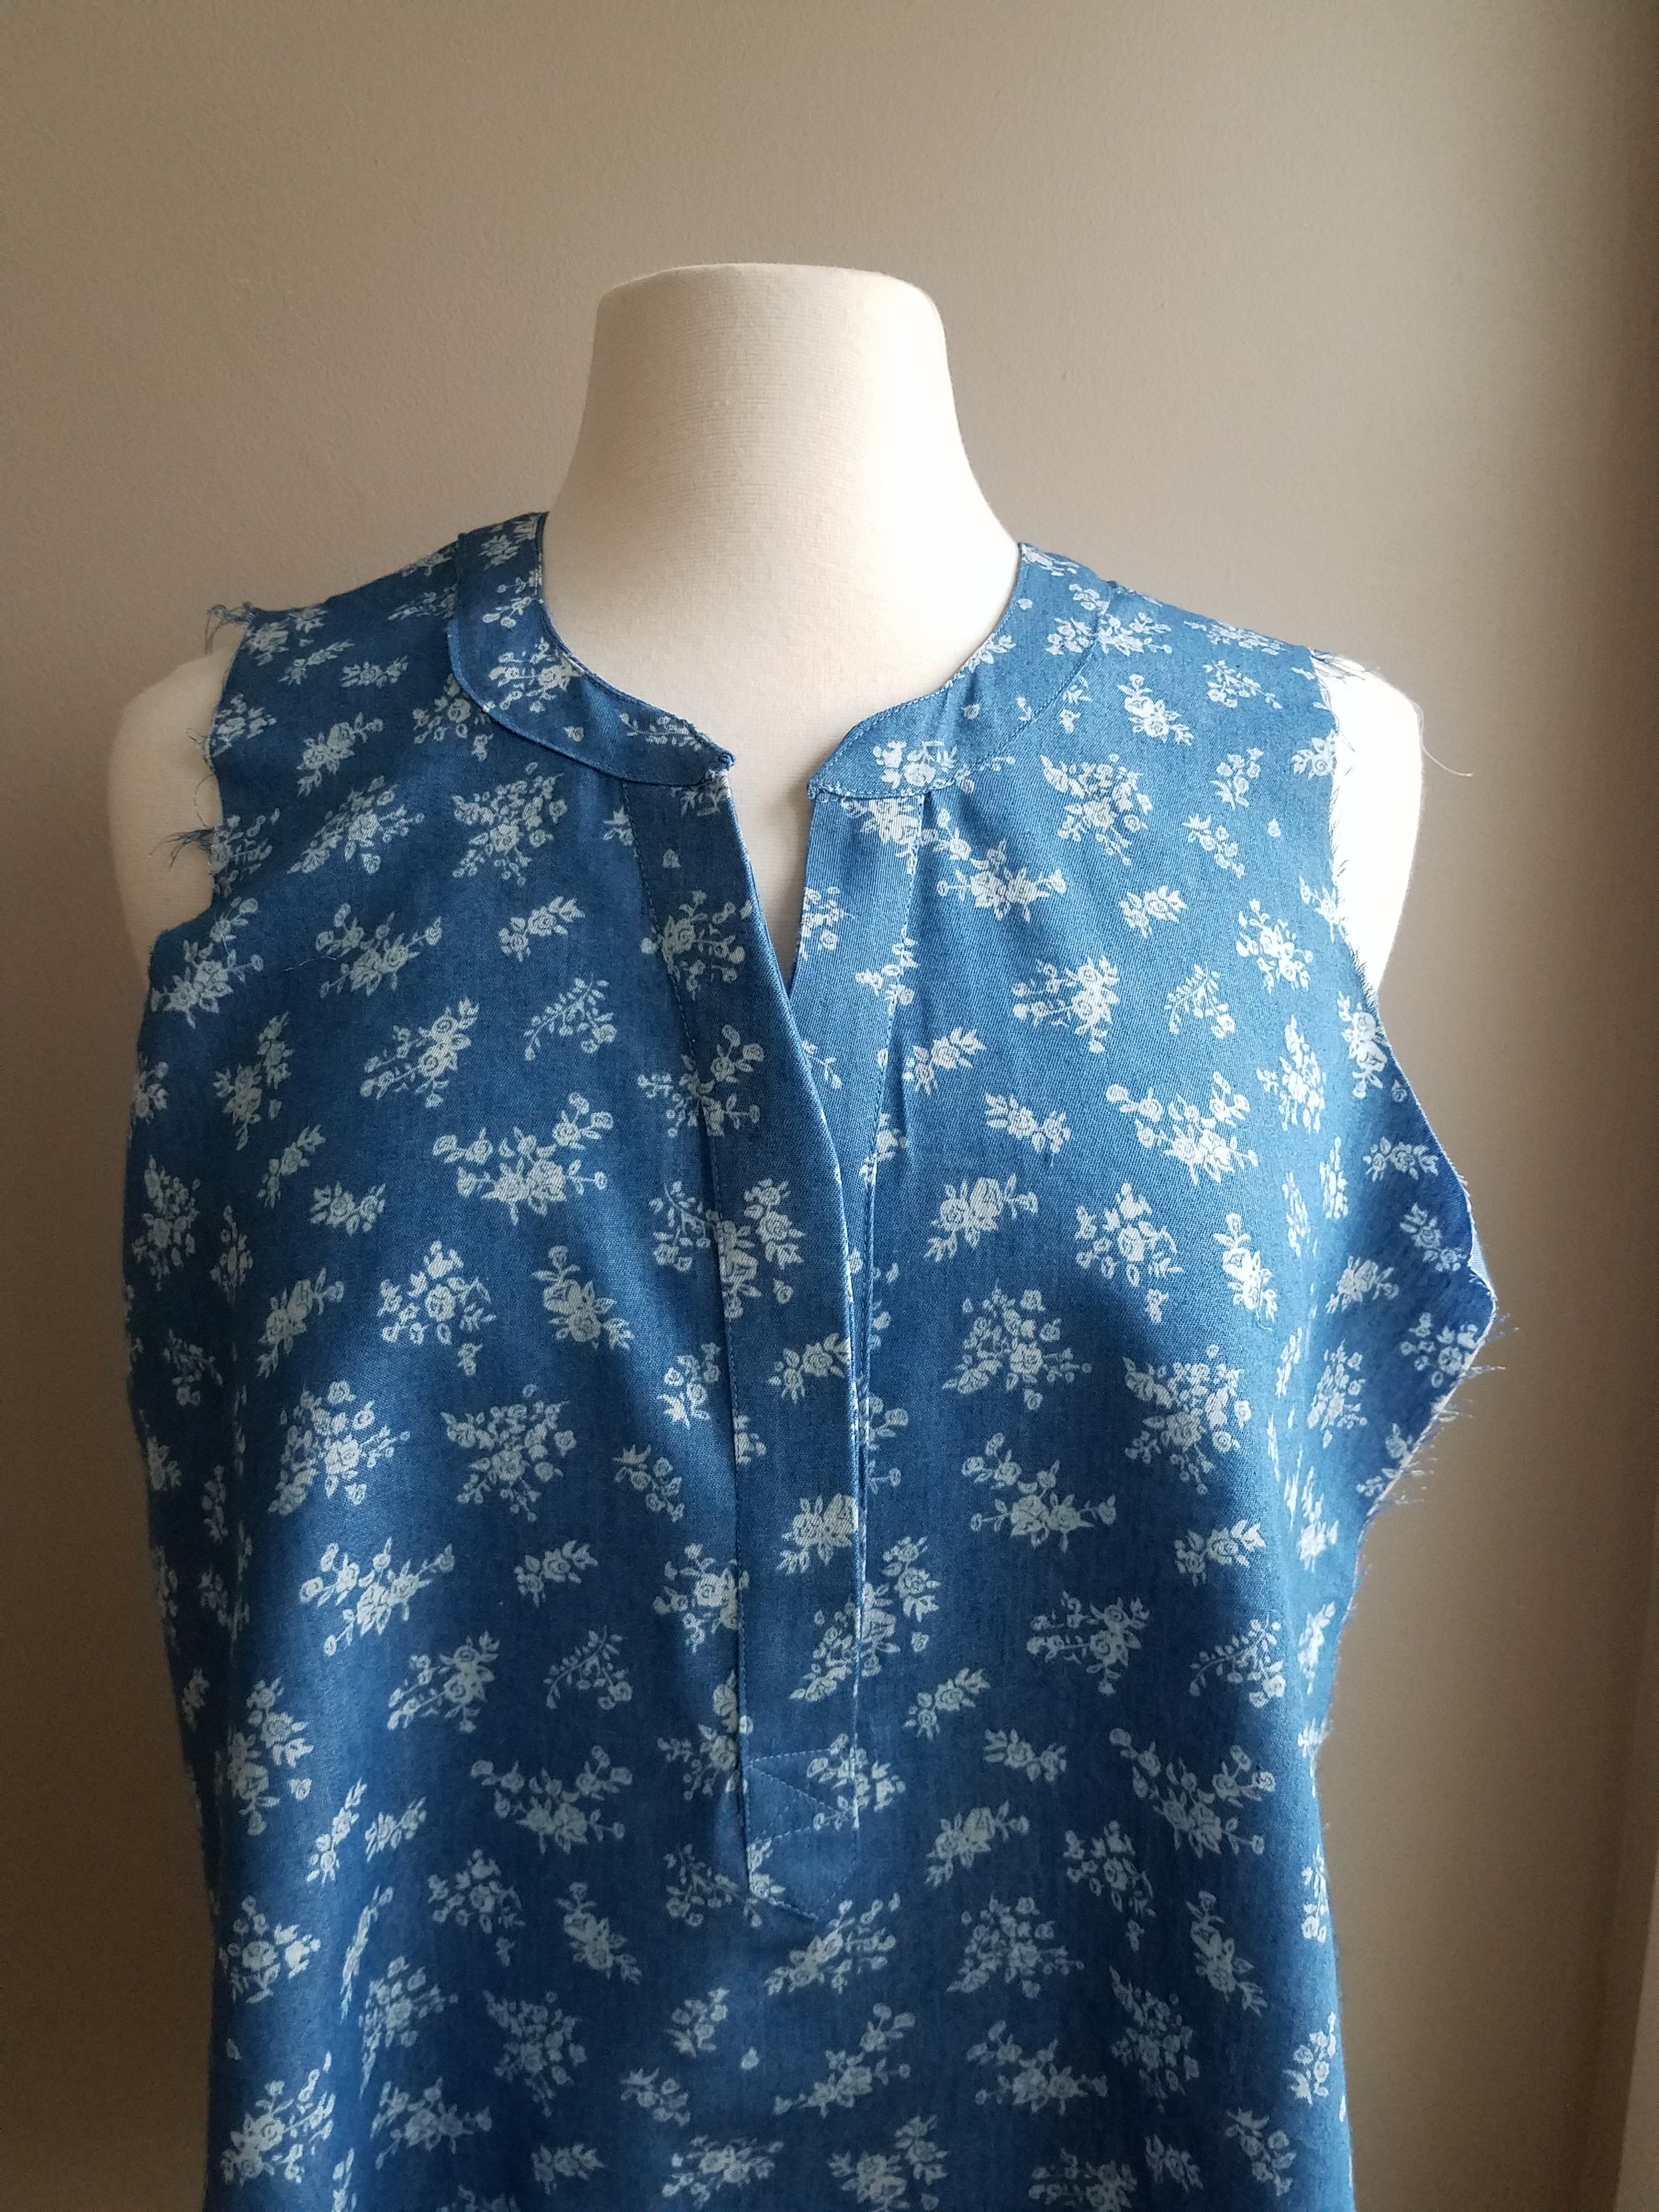
I had to cut my bonus Cheyenne (vintage floral chambray) after getting some adulting out of the way so this photo was taken at night. (Makes it feel a bit like a day and night challenge, and I'm still giggling about that.) I opted for the half placket (popover) view, modified to be sleeveless. It was such a joy cutting this out with pretty much zero regard to the pattern on the fabric. I hope I did it right!
Day 3-

Isn't that chambray gorgeous in daylight?
Plackets today. Well. plackets can be pretty tricky so I'm thankful for the sew along on the Hey June blog for these steps. I didn't know the sew along existed until after I had sewn my first Cheyenne way back when and boy was I kicking myself for not thinking to check for it then.
You could add buttonholes and buttons at this point. I'm a fan of choosing button placement when you've got a more finished garment that you can try on and can test the button locations by pinning, so I held off.
I shortened the placket pieces for the half placket by an inch and a half (and cut the center slit shorter by the same amount) since I recall the placket being a bit long on my frame in my previous Cheyenne.
Ultimately, I wasn't sure which buttons I was going to use, so I'm letting my options percolate a bit more.
The gingham ones might just be perfect or too over the top. It's a fine line.

Day 4-
First they were burritos.

And then they were practically shirts!

Along the way, there was a very happy moment when I turned the flannel one and discovered this happy accident here.
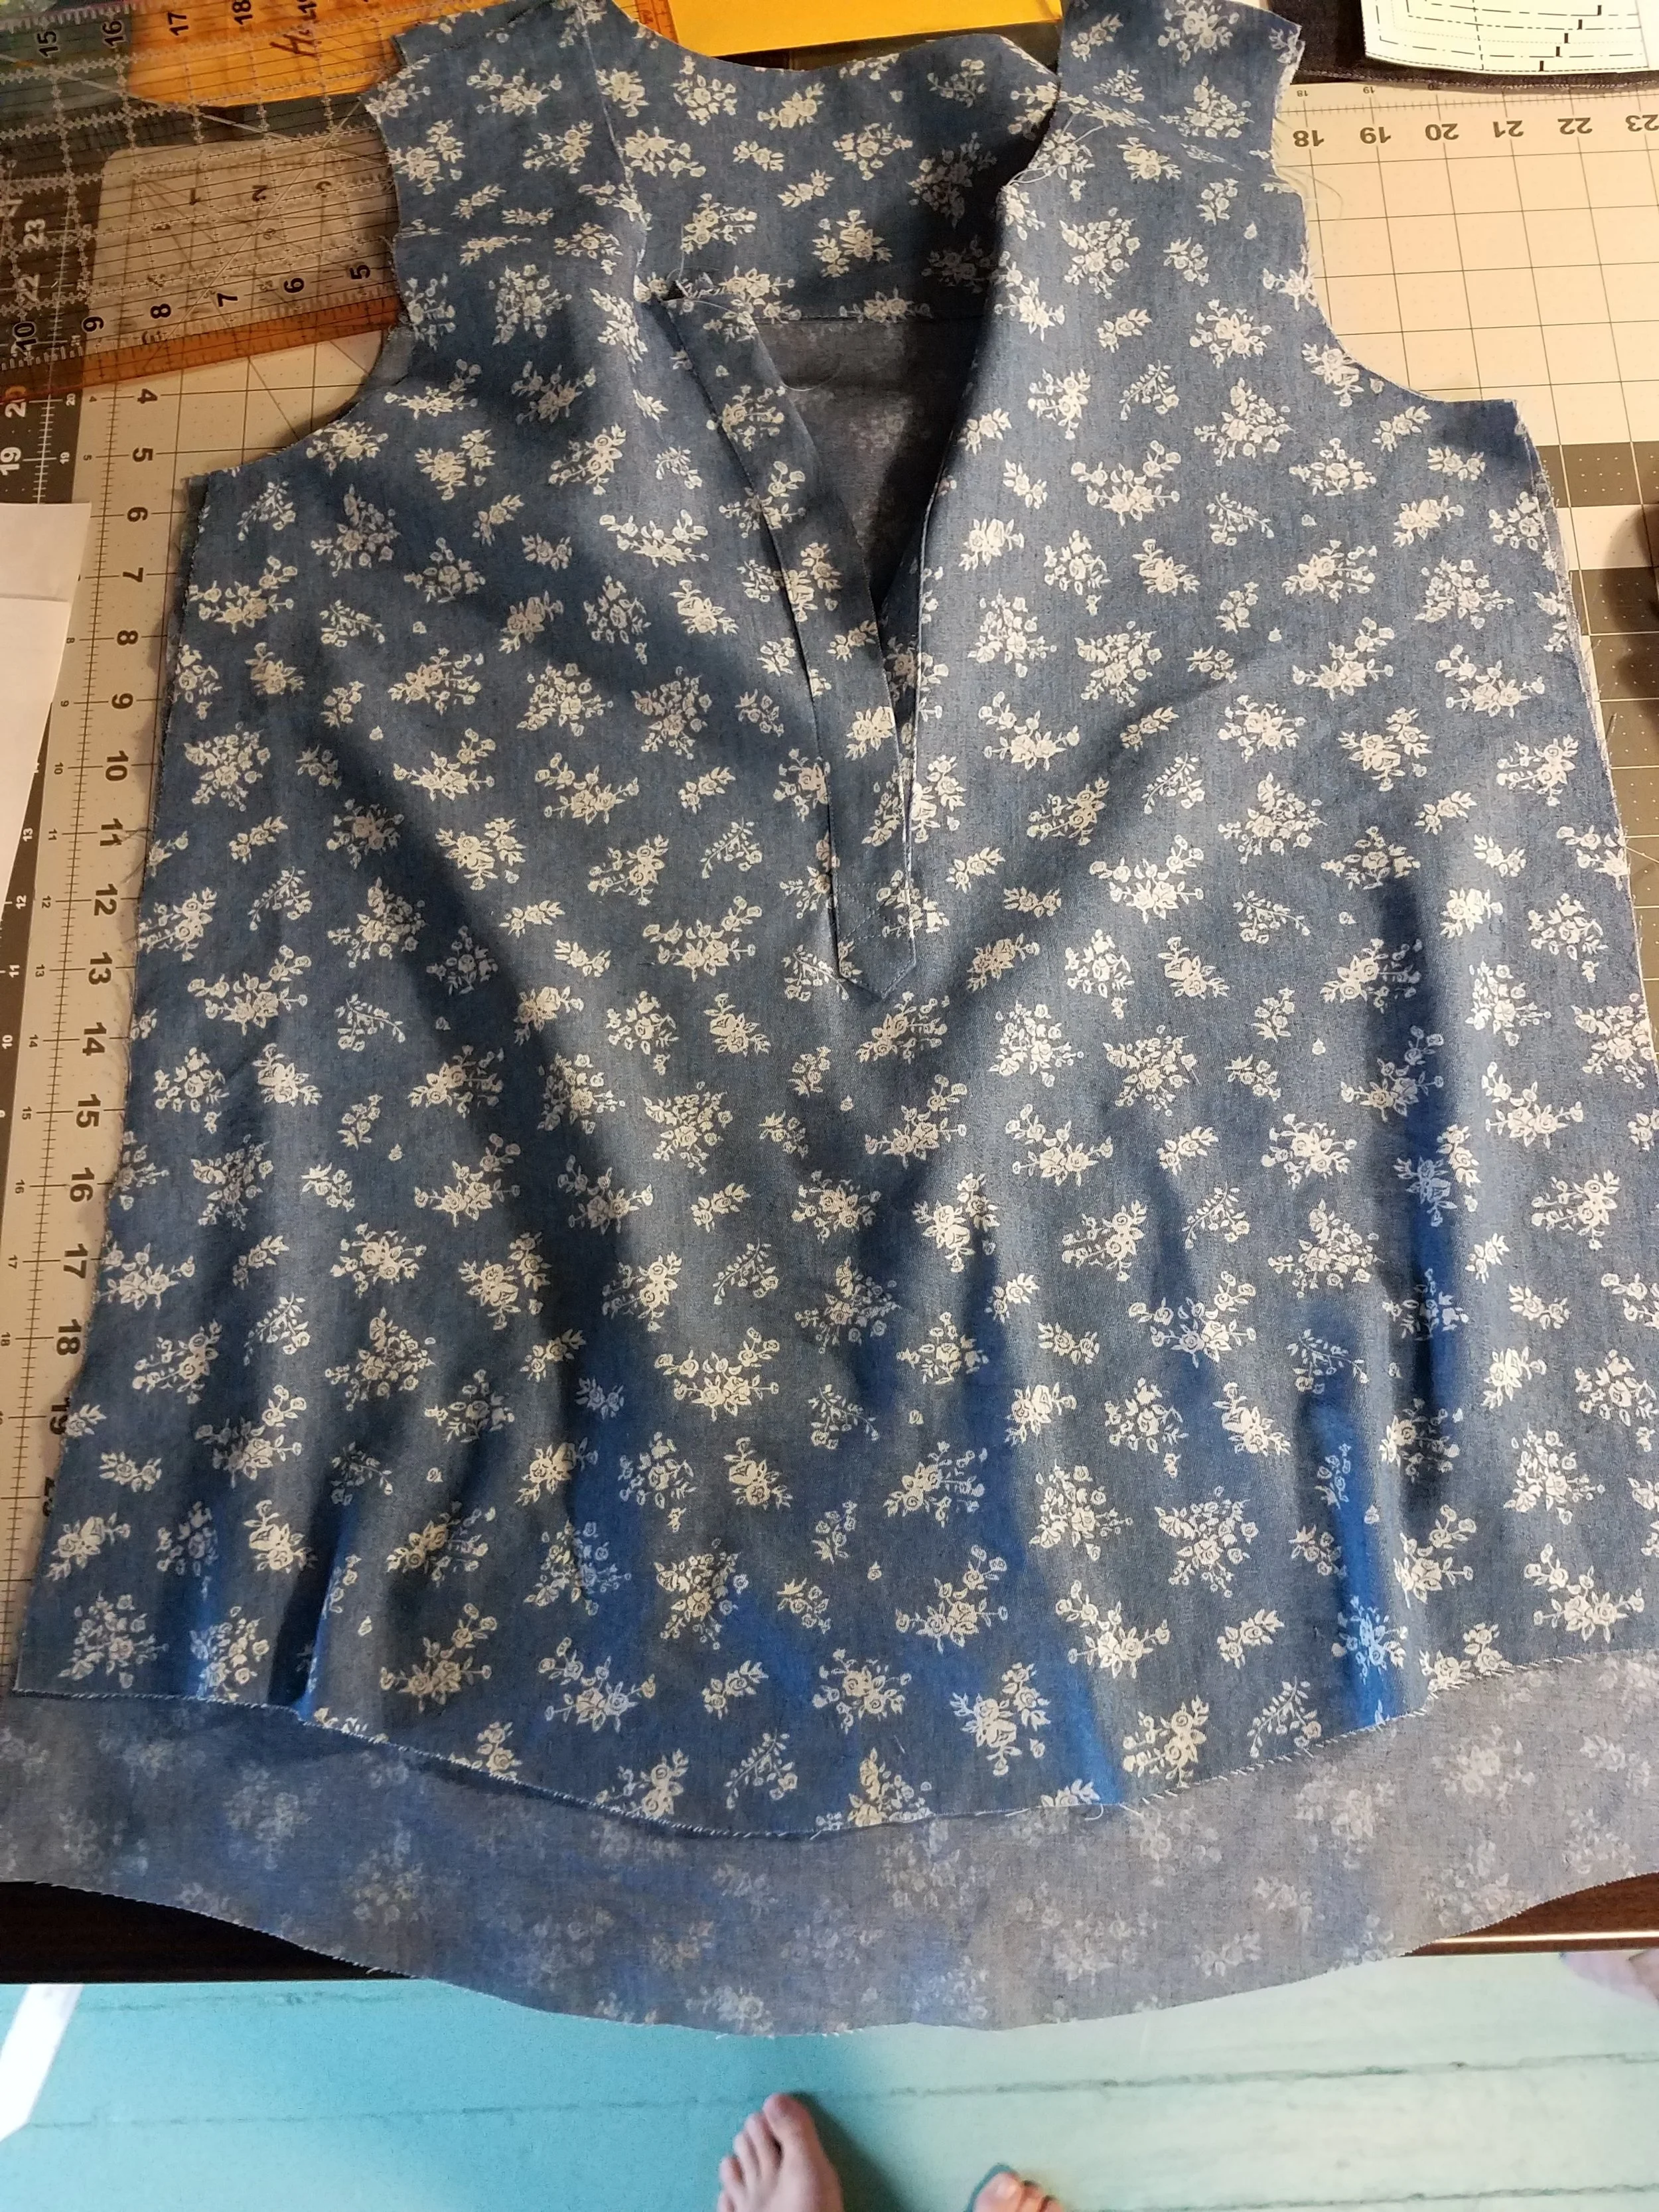
But I also discovered the front and back side seams on the chambray version were not the same length. Somehow when I adjusted the armscye to make it sleeveless I ended up changing the side seam length. Or maybe I just cut the front at the shirt line and the back at tunic. Who knows. Anyway, it wasn't anything my rotary cutter couldn't fix.
Day 5-
Very little progress. I think I was busy trying to cull my large fabric stores (aka destash).
This sleeve placket is all I have to show.

Day 6, aka The Finish-
It all finally came together. I set the sleeves on the flannel version.


I basted the side seams and tried her on and decided to alter the hem line a tad. I scooped out side using my dressmaker's curve as a guide. Then finished the hem with chambray bias. Just because I liked adding those little hints of chambray.

Added the cuffs, buttonholes and buttons. She's ready to show off tomorrow!
The sleeveless version had a lot less work left. Just the hem, side seams, and armscye finishing. I like to do French bias binding most often. Here's my go to tutorial when I need a refresher. She just needs one snap to keep the placket closed. I'll sew it on tomorrow. Because hand-sewing is not my favorite sewing.

Day 7- Show it off

and it's safe to say I love it.


I really love the extra scoop out of the hem in this longer length.


(Are my sleeves too long? The cuff hangs past my wrist. Although I had shortened them an inch, I wonder if I might be able to improve the fit a bit more.)
Pardon the wrinkles. I did my pictures in the wrong order, having worn it first to ihop for breakfast (nom!) and then did my flat, detail shots.


The finish is just superb. You could practically wear Cheyenne inside out.

The (bonus!) sleeveless one. It came out a wee bit snug across the chest, which is my fault and a result of how I modified the armscye. I think I also raised it a tad too much. But it's still very wearable. I just had to hand stitch a snap inside the placket this morning. (I opened my hoarded Thread Heaven!)


This one is cut to shirt length and has a simple tiny hem.

I'd love to hear any tips you might have on improving my finish on the collar of this version. It's rather bulky at the corners.

I'll leave with 2 things. First- my favorite outtake. I really shouldn't try to be suave.

And second- check out all the other great Cheyennes made for the sew along and shared on IG under the tag #mmfsewscheyenne! It was really a lot of fun seeing so many different permutations of this pattern come together over the past week. Thanks again, Grace! I look forward to the next one.


