


Reynolds x Winslow
I finally snagged the Helen’s Closet Winslow Culottes pattern during a recent sale. Which!! overlapped with the release for Reynolds, so I bought both patterns at a discount. (Squee!)

Winslow Culottes

Reynolds Top and Dress
Add to that 4 yards of striped rayon linen (Alyssa May sourced) and suddenly we’re talking swishy summer swanning set of dreams.
If you’re not familiar with Winslow (but I thought I was the last one?), they have an invisible zipper at the center back. I wasn't sure I wanted a zipper in my not so proverbial crack so when my stash failed to produce an invisible zip anyhow, I headed straight to Helen's blog for her insight on the modifications needed for an elasticated back waist.
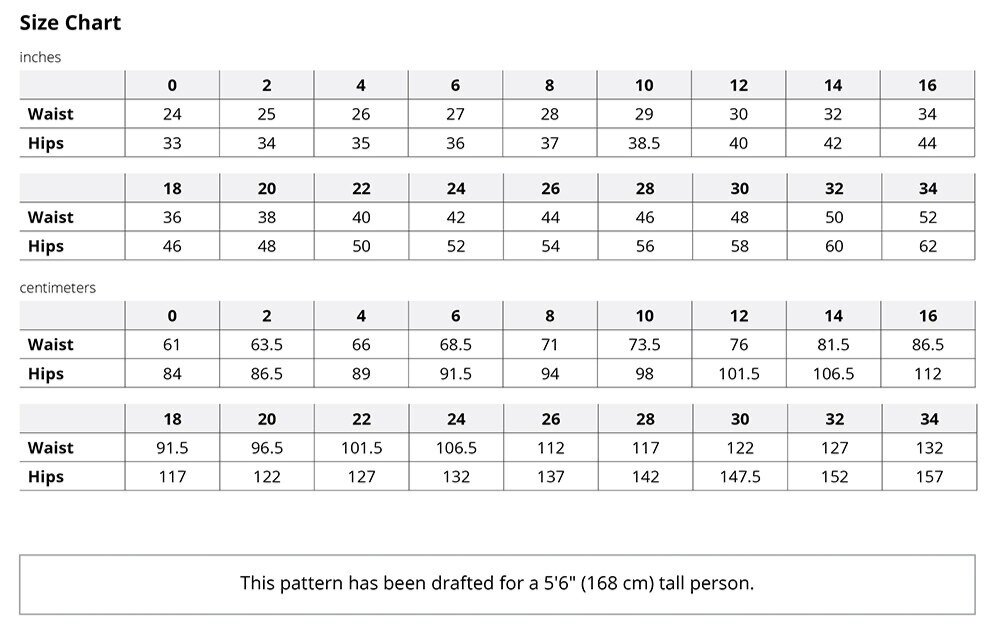
I chose size 10 based on my 29” waist measurement.
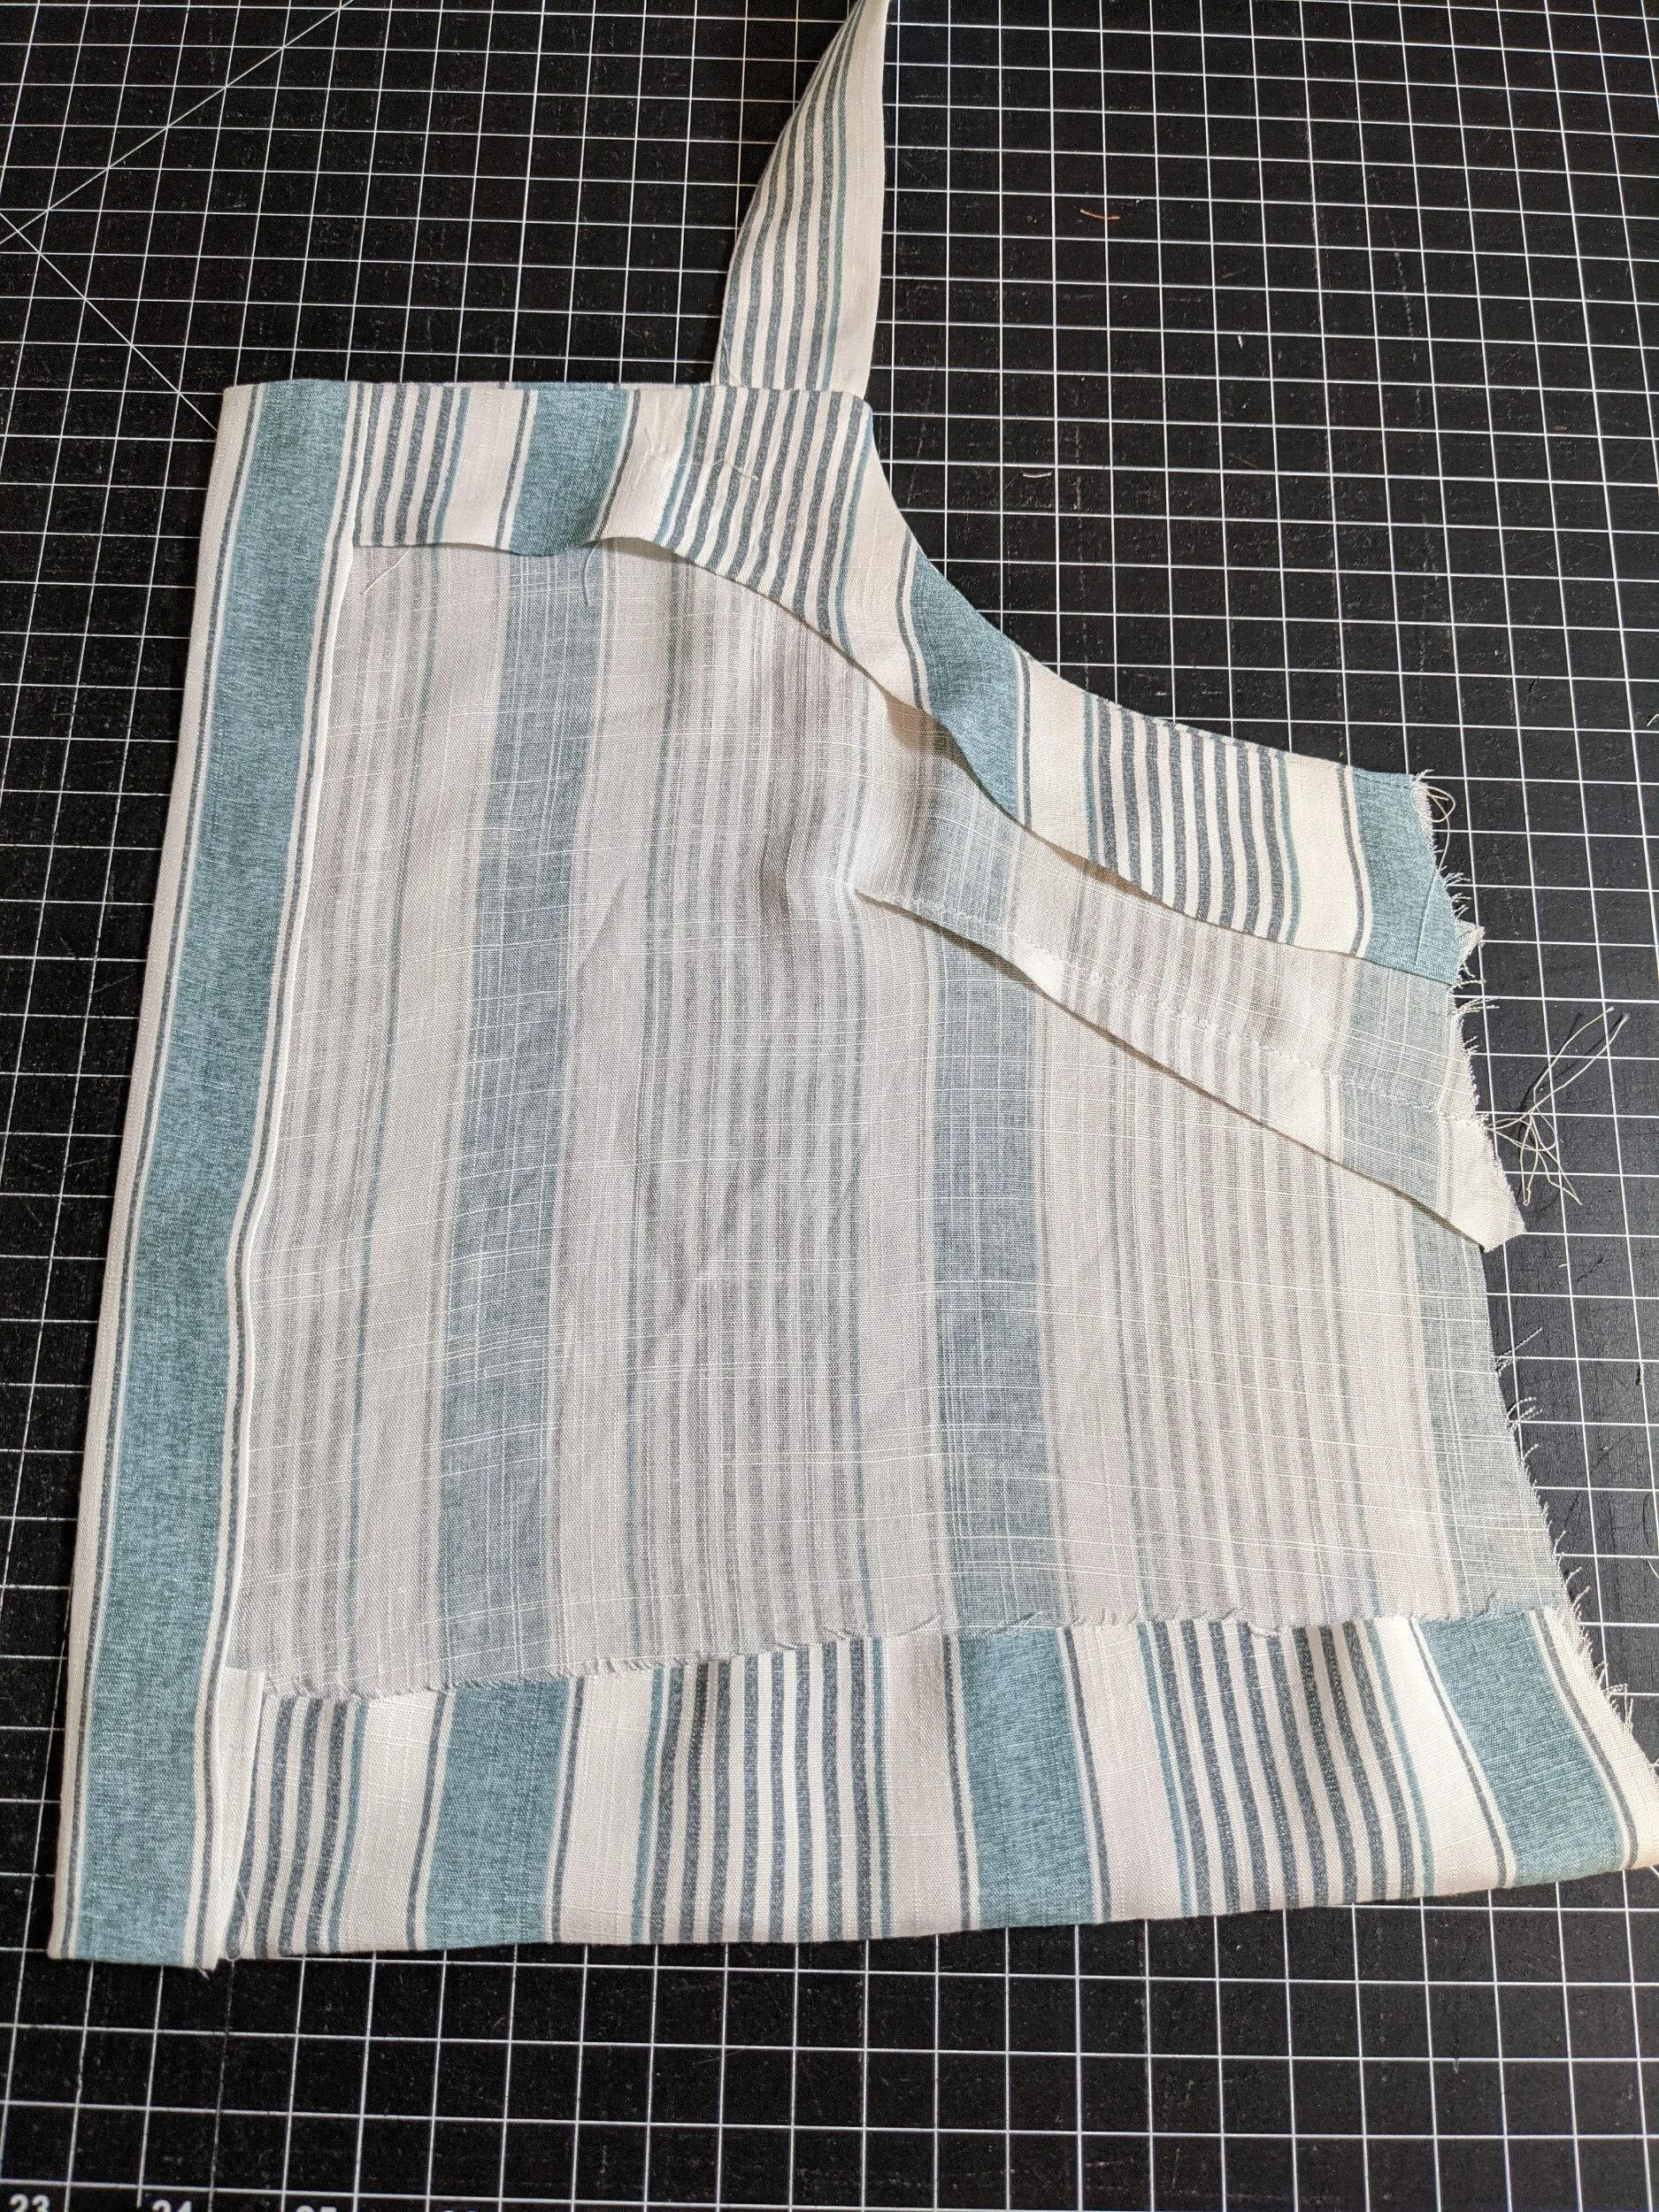
I used 2” wide knit elastic because my stash said so. There’s actually elastic in the front of the waistband for stability but it’s not stretched there. For me, this added 22” of elastic. I know it got this idea to use non stretched elastic in the front of the band from a recent comment thread somewhere, but I cannot find it, otherwise I would love to credit and thank the sewing genius behind it.


I typically try to sew new-to-me patterns as designed without making any changes first, but I also knew I would be happier with the inseam pockets if their tops were incorporated into the waist seam. I extended them right from the start. (Just align the notches with the front pants pattern piece and extend it to match shape of the side seam and waist.)


The pockets are ample and amazing.
With Reynolds, I did sew a (wearable) muslin without any modifications before getting hack-y with it.

Why add functional buttons to a top one can take on and off over the head? BECAUSE IT’S FUN AND WE CAN. I also liked the idea of breaking up the plain front a bit since I was making a set. Buttons add a little break in the stripes and a touch of visual interest.

I cut size 10 for Reynolds, based on body measurements HB 35”, FB 36”.
I added 2.5” width to each front at the fold line which becomes a ‘cut 2, mirrored’ line. (Placket math really boggles my brain for no good reason. I make sure to mark the center front and plan for overlap from there.) I almost always use 2” wide tricot interfacing for plackets. The neckline facing joins the edge of the grown-on placket before being stitched on (a little trick I learned sewing the Wren pattern).

Our approaches may be slightly different, but Helen’s post for her button front Reynolds is perfectly illustrated and goes in to much more detail.

et voila! Reynolds x Winslow!

I assure you any stripe matching is purely incidental. I cut both patterns mirroring the stripes, but otherwise didn’t attempt to fussy cut things.

I love the Winslows with a tank too.

One must pose as such when wearing Winslow.
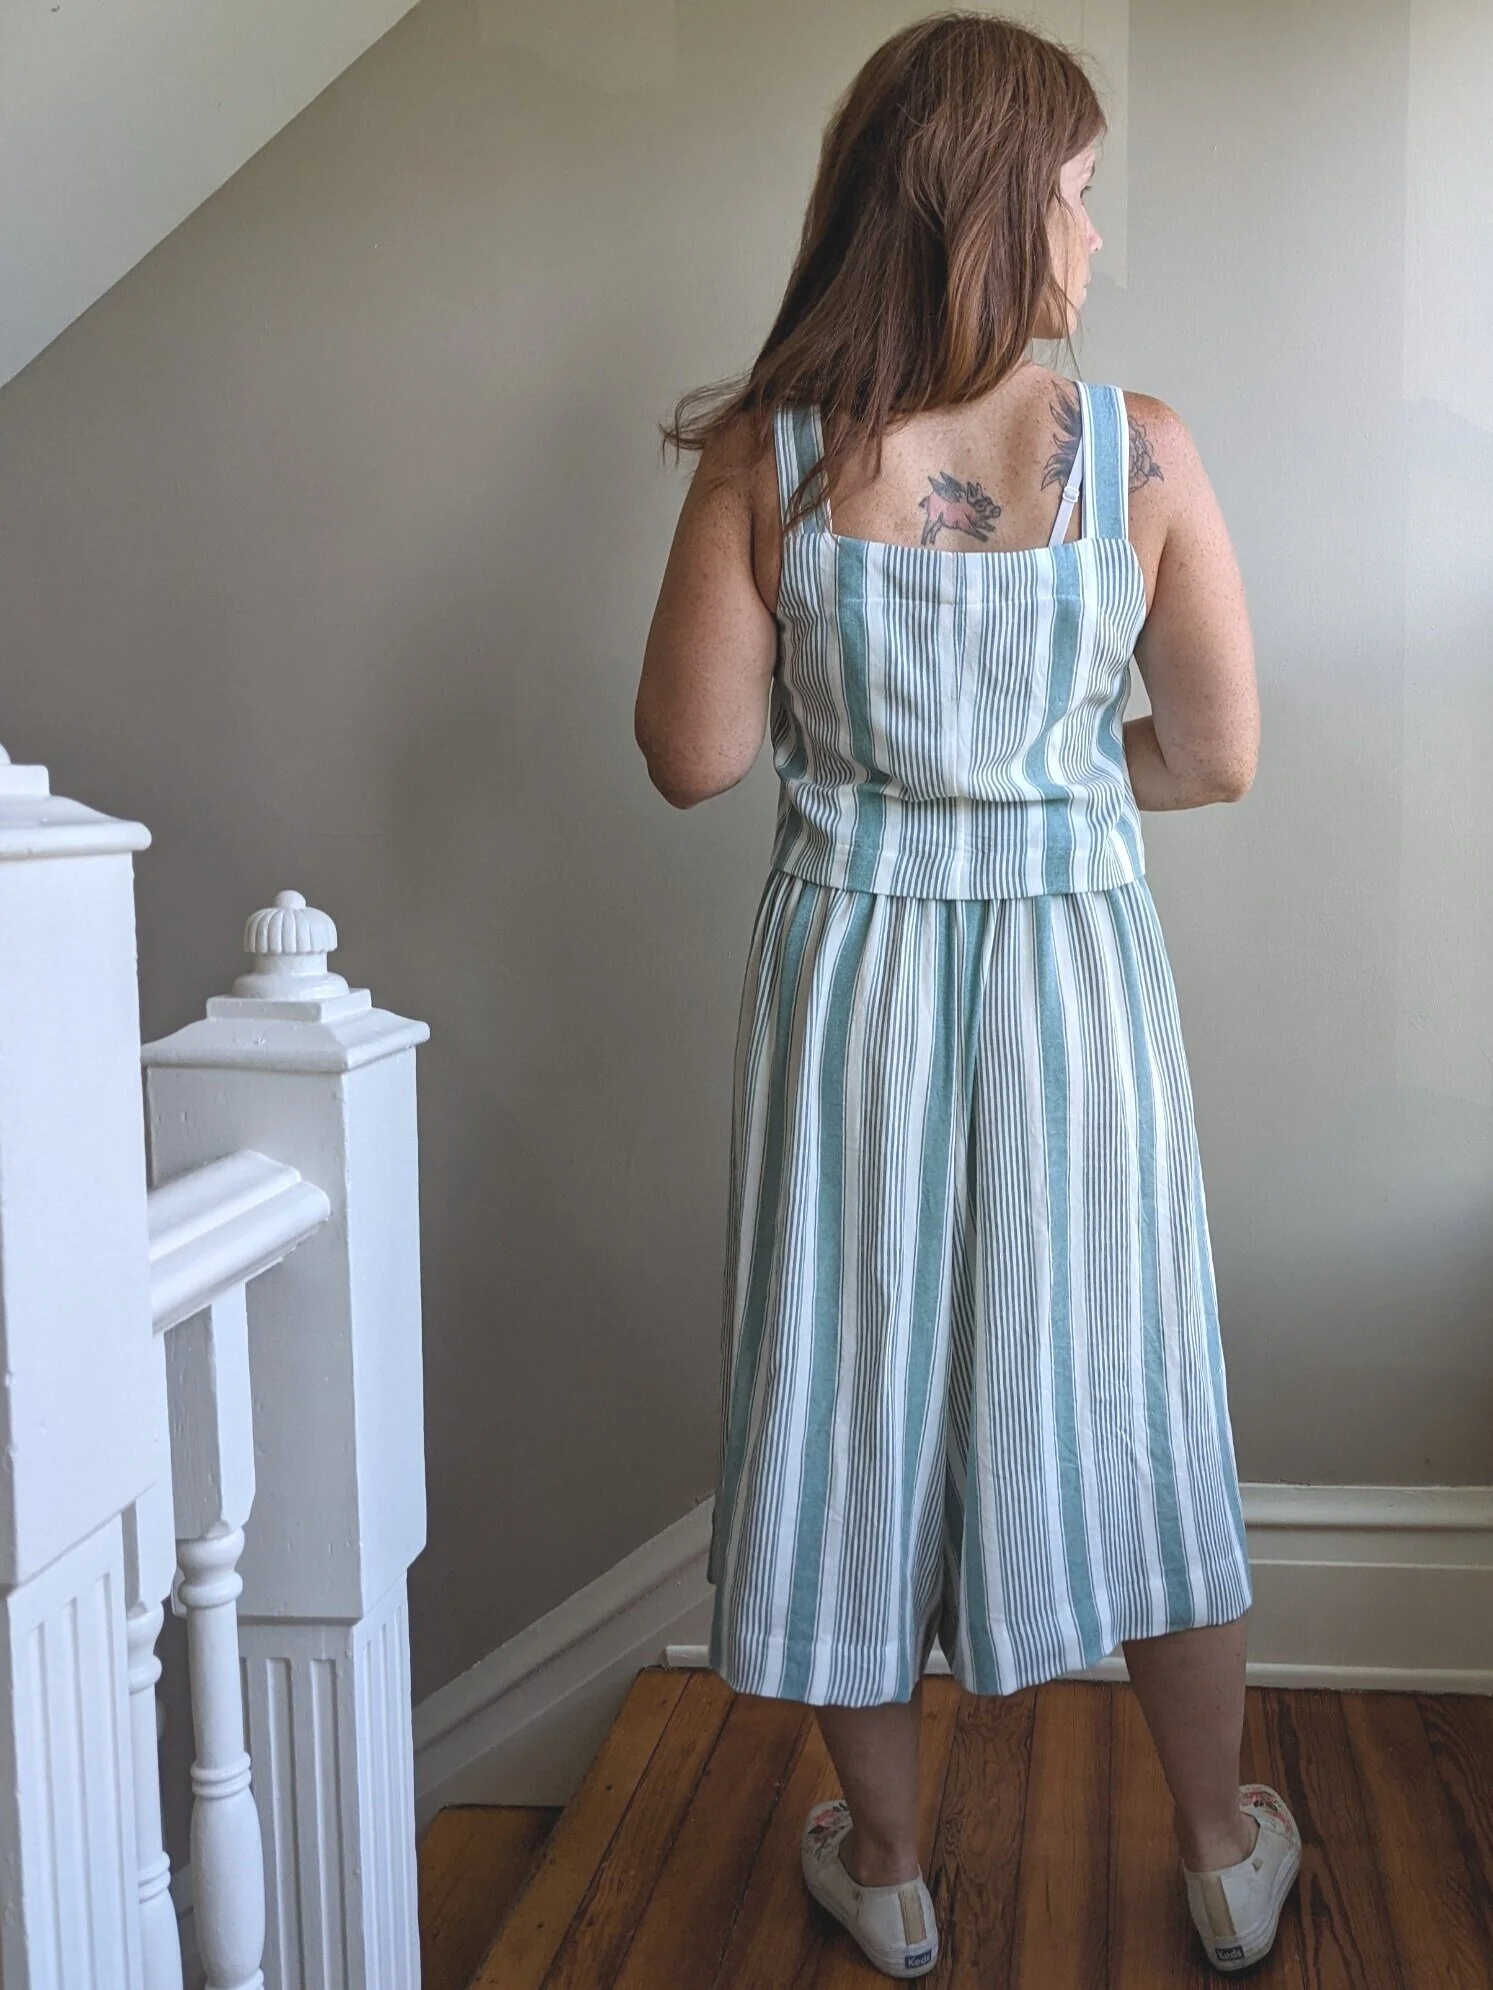
This fabric seems to want to say I need to adjust for a sway back issue here.
I’ll leave you with a quick little Reynolds x Winslow action vid.
I’m pretty happy with my set and I’m looking forward to playing more with both patterns. Helen has several Winslow hacks posted to her blog and I suspect she’ll be sharing just as many Reynolds hacks soon too!
Before sewing Reynolds and Winslow, I had only tried the free Luna tank pattern. (You can try it gratis too!)

